| Cheap DIY A/C delete bracket |
|
| Written by Ken Huey | |||
| Saturday, 19 January 2008 08:50 | |||
|
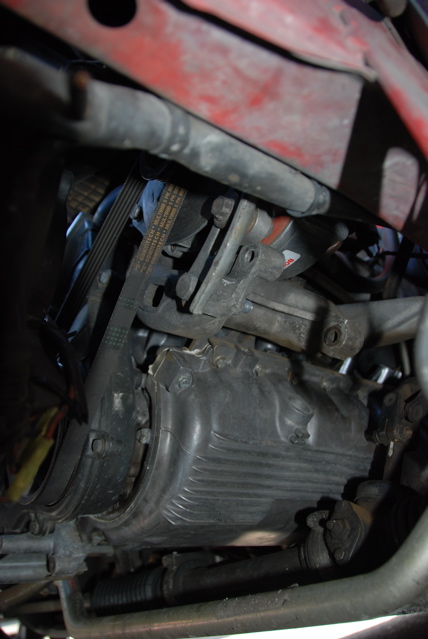
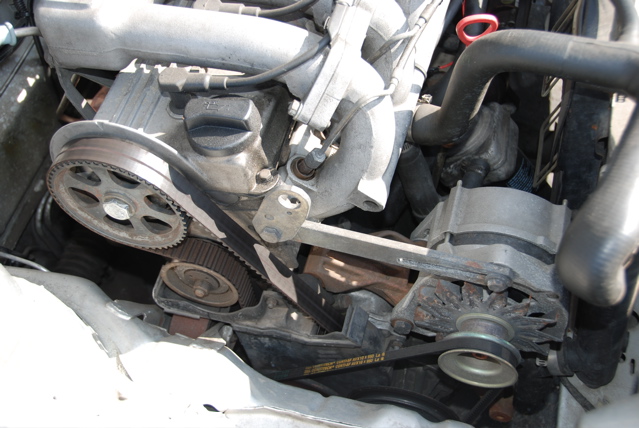
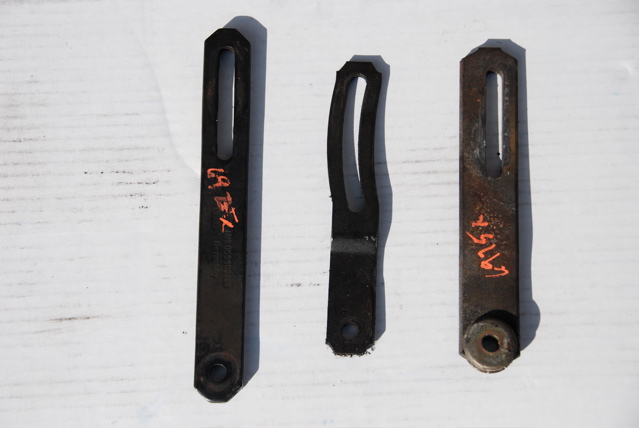
On 944's equip with factory A/C, a belt runs through the alternator and A/C compressor. It's not as simple as removing the A/C compressor and getting a shorter belt to the alternator because the belt tensioning is done at the A/C compressor pivot point. Porsche sells a A/C delete kit which relocates the alternator to where the A/C compressor was and uses the same factory hardware for tensioning the belt. This is a real nice setup and have the added benefit of bringing the weight of the alternator to a lower center of gravity. The drawback is the price, about $160 for the A/C delete kit. This article shows how to make a bracket to pivot the alternator for the belt tensioning, the alternator is left in place in it's original factory bracket. The tensioning bracket was made for less than $5 (five dollars). What you'll need is a alternator adjustment bracket simliar to the ones in the following picture. VW works nice. It doesn't matter which car, what we're looking for is an oblong hole to use for tensioning adjustment. We purchase these various brackets at a local pick and pull for $2-$3 each and all these will work. What you'll need besides a bracket.
You'll need to cut these down to about a 5" overall length starting from the end with the oblong hole.
Using the Martha Stewart ruler as a guide Next is to install this with your alternator. Assuming your A/C compressor is already off
Special thanks to Art at AutoPoint Motors for coming up with this idea after looking at his VW Rabbit.
|
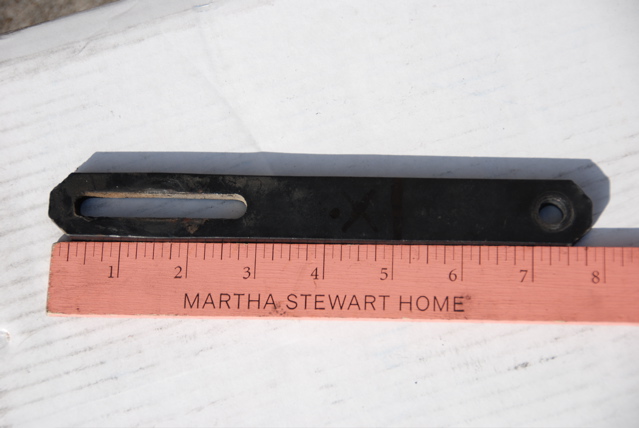
 you can cut this piece at the 5" mark and drill a 23/64" hole at approximately the 4.5" mark. The hole can be a little bigger if you don't have a 23/64" drill bit. That's all there is in making this bracket!